WordPress Auto-Publishing Setup Guide for Agility Writer
Step-by-step instructions for connecting Agility Writer to your WordPress site for seamless auto-publishing, including configuration, troubleshooting, and best practices.
Adam Yong
Founder & CEO
Publishing AI-generated content should not involve copying and pasting between tools, which is why we created this WordPress Auto-Publishing Setup Guide for Agility Writer.
We know exactly how frustrating the manual publishing bottleneck feels for scaling agencies. Adam Yong, our founder, spent nearly two decades as an SEO professional before building Agility Writer to solve these exact scaling problems. Recent 2026 data indicates formatting and uploading a single blog post manually takes roughly 45 minutes.
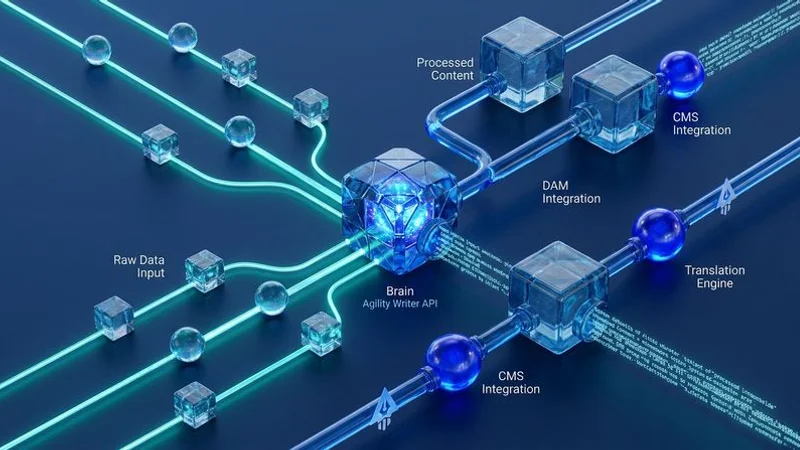
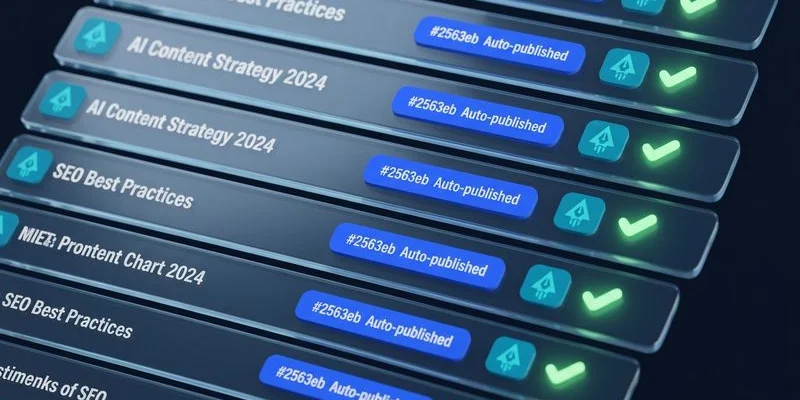
This AI SEO writer’s WordPress auto-publishing integration eliminates that manual step entirely, sending finished articles directly to your site. Whether you manage a single Malaysian blog or coordinate content globally, this integration saves significant time and prevents formatting errors.
Prerequisites
Data from 2026 shows WordPress commands roughly 70% of the CMS market share in Malaysia alone. You are likely already using it for your primary content properties. Before starting the setup, ensure you have the following in place:
- A self-hosted WordPress site running version 5.6 or later (WordPress.com hosted sites work with Business plan or higher).
- Administrator access to your WordPress dashboard.
- The WordPress REST API enabled (it is enabled by default on most installations).
- An active Agility Writer account with access to the integrations settings.
We highly recommend checking your security plugins first. If you use a security plugin or a Malaysian host like Exabytes that restricts API access, you will need to whitelist Agility Writer’s IP addresses. The troubleshooting section below covers those exact steps.
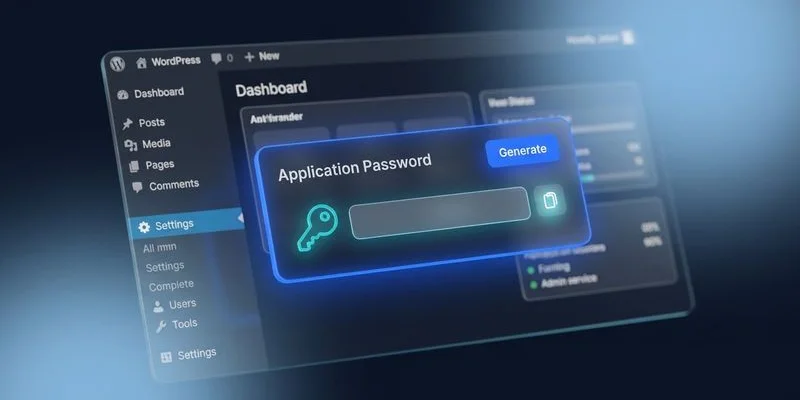
Step 1: Generate WordPress Application Password
WordPress uses application passwords to authenticate external tools without sharing your main login credentials. This provides a much safer alternative to handing out your primary username and password.
To generate an application password:
- Log into your WordPress admin dashboard
- Navigate to Users and click on your administrator profile
- Scroll down to the Application Passwords section
- Enter “Agility Writer” in the New Application Password Name field
- Click Add New Application Password
- Copy the generated password immediately, as it will not be shown again.
We strongly advise storing this password securely. You will need it in the next step to finalize the connection.
Important Security Note
Application passwords grant API access with the same permissions as the associated user account. Use a dedicated administrator account for the integration rather than your personal admin account.
This makes it easy to revoke access later without affecting your own login credentials. Many SEO professionals create a specific “Agility API” user profile just for this purpose.
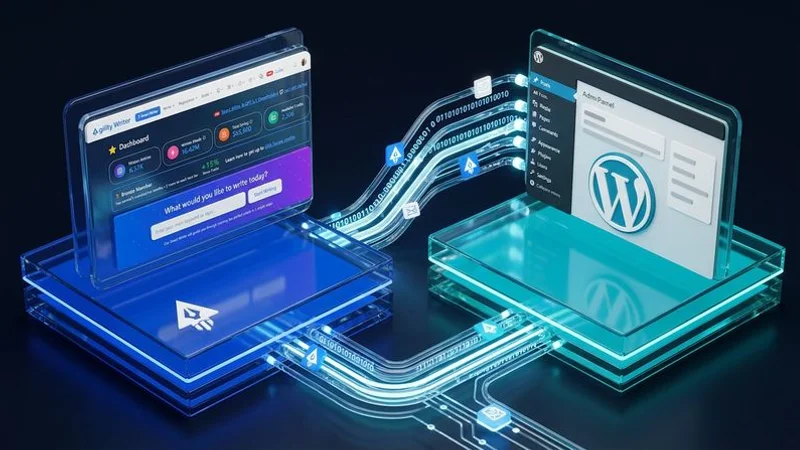
Step 2: Connect WordPress in Agility Writer
With your application password ready, connect your WordPress site in Agility Writer. The process takes less than two minutes.
Follow these exact steps to establish the connection:
- Open your Agility Writer dashboard
- Navigate to Settings and then Integrations
- Click Add WordPress Site
- Enter the following details:
- Site URL: Your WordPress site URL (e.g.,
https://yourdomain.com). Always include thehttps://prefix. - Username: The WordPress administrator username associated with the application password.
- Application Password: The password you generated in Step 1.
- Site URL: Your WordPress site URL (e.g.,
- Click Test Connection to verify the setup
- If the test succeeds, click Save
We verify the connection immediately. A successful test confirms that Agility Writer can communicate with your WordPress REST API and has the necessary permissions to create posts.
Managing Multiple Sites
You can connect multiple WordPress sites to a single Agility Writer account. Each site has its own connection credentials and publishing settings.
This feature proves incredibly useful for agencies managing content across client sites or businesses running multiple niche blogs. You can also connect Agility Writer to other platforms using Zapier automation workflows.
Step 3: Configure Publishing Settings
Once connected, configure how Agility Writer publishes content to your WordPress site.
Post Status Options
Choose the default status for published articles based on your editorial workflow.
- Draft: Articles are created as drafts, requiring manual review and publishing in WordPress. Recommended for teams that want a human review step before content goes live.
- Pending Review: Articles are submitted for review, visible to editors but not published. Useful for multi-author workflows with editorial approval.
- Published: Articles are immediately published and live on your site. Only recommended for teams confident in their content quality and review process within Agility Writer.
Category Mapping
Proper category mapping ensures articles land in the correct sections of your WordPress site without manual recategorization.
- In the publishing settings, locate the category mapping section.
- For each Agility Writer category you use, select the corresponding WordPress category from the dropdown.
- If the WordPress category does not exist yet, create it in your WordPress dashboard first, then refresh the mapping list.
Author Assignment
Choose which WordPress author account to assign to published articles. This helps maintain a consistent voice and proper attribution across your blog.
You can select a specific author for all auto-published content. You also have the option to configure per-category author assignments if different team members own different content areas.
Featured Image Handling
Agility Writer handles featured images in two distinct ways to match your design preferences.
- Include featured image: The article’s hero image is uploaded to your WordPress media library and set as the post’s featured image automatically.
- Skip featured image: Only the article body is published, allowing you to add featured images manually in WordPress.
We suggest checking your theme specifications first. If your WordPress theme has specific featured image dimensions, ensure your Agility Writer image settings produce compatible sizes to avoid display issues.
Step 4: Test Your First Auto-Publish
Before relying on the integration for production content, run a quick test.
- Create a short test article in Agility Writer.
- Select your WordPress site as the publishing destination.
- Publish the article.
- Open your WordPress dashboard and verify the following elements.
| Verification Point | What to Check For |
|---|---|
| Post Status | Is it correctly set to draft, pending, or published? |
| Content Integrity | Are the title, body content, and formatting preserved? |
| Categorization | Did the article land in the correct mapped category? |
| Attribution | Is the correct author assigned to the post? |
| Visuals | Does the featured image display properly without cropping issues? |
If anything looks off, check the troubleshooting section below before publishing production content.
Step 5: Set Up Bulk Publishing (Optional)
For teams generating content at scale, bulk publishing sends multiple articles to WordPress in a single operation. Pairing this with the bulk AI article generator is highly efficient for large content hubs.
- Generate a batch of articles using Agility Writer’s bulk mode.
- Review the articles within Agility Writer.
- Select all approved articles.
- Choose Publish to WordPress from the bulk actions menu.
- Select the target WordPress site and confirm the publishing settings.
- Start the bulk publish operation.
We pace the uploads carefully. Articles are published sequentially with a brief delay between each to avoid overwhelming your WordPress server.
You can monitor the progress directly in the bulk operations dashboard.
Formatting Considerations
HTML and Blocks Compatibility
Agility Writer publishes content as standard HTML. This format is fully compatible with both the Classic Editor and the Block Editor (Gutenberg).
In Gutenberg, the content initially appears as a Classic block. You can easily convert this to individual blocks within the WordPress editor if desired.
Headings and Structure
Article headings (H2, H3, H4) are preserved exactly as generated during auto-publishing. Ensure your WordPress theme styles these heading levels appropriately.
If your theme’s heading styles do not match your expectations, adjust the theme CSS. Modifying the Agility Writer output is rarely necessary.
Internal Links Verification
If your articles contain internal links to other pages on your WordPress site, verify that the link URLs match your WordPress permalink structure.
Agility Writer generates links based on the URLs you configure during content creation. Mismatches between your planned URL structure and your WordPress permalink settings will result in broken internal links.
Troubleshooting Common Issues
Connection Test Fails
If the connection test fails, a firewall or security setting is usually the culprit. Check these common causes to restore access.
- Incorrect site URL: Ensure you are using the full URL including
https://. Try both with and withoutwww.. - Wrong credentials: Double-check the username and application password. Application passwords include spaces that are part of the password string.
- Wordfence API Restrictions: Wordfence blocks REST API access by default on some setups. You must uncheck “Prevent discovery of usernames through ’/?author=N’ scans, the oEmbed API, and the WordPress REST API” in the Login Security Options.
- Cloudflare Bot Fight Mode: In 2026, Cloudflare’s Bot Fight Mode frequently returns a 403 Forbidden error for REST API requests. You may need to whitelist your server IP or temporarily disable Bot Fight Mode.
- Server firewall: Contact your Malaysian hosting provider (like ServerFreak or Exabytes) to ensure API requests from external services are not blocked at the server level.
Content Formatting Issues
Occasionally, published content may display formatting anomalies.
- Missing line breaks: Check that your WordPress editor is not stripping paragraph tags. This occasionally happens with certain aggressive page builder plugins.
- Broken images: Verify that your WordPress site allows remote image uploads. Also, ensure your media library has sufficient storage space available.
- Stripped HTML: Some security plugins sanitize HTML too aggressively. Configure them to allow standard content HTML tags.
Authentication Errors After Working Previously
Application passwords can sometimes stop working unexpectedly. This typically happens for three specific reasons.
- The associated user account password was changed, which invalidates application passwords on some server configurations.
- The user account was deactivated or completely deleted.
- A security plugin reset all application passwords during a routine update.
We recommend generating a new application password if this occurs. Update the connection settings in Agility Writer to resolve the issue quickly.
Best Practices in this WordPress Auto-Publishing Setup Guide for Agility Writer
Adopting a few key habits will keep your publishing pipeline running smoothly.
- Always publish as draft first until you are confident in the integration quality. Switch to auto-publish only after verifying several test articles.
- Use a dedicated WordPress user for the integration. This allows you to track and manage auto-published content separately from manual posts.
- Monitor your WordPress site after bulk publishing operations to ensure all articles rendered correctly and did not tax your server limits.
- Keep your WordPress plugins updated to maintain full REST API compatibility.
- Review published content in your WordPress theme’s frontend view, not just the admin editor. This catches any live display issues immediately.
The system we outlined in this WordPress Auto-Publishing Setup Guide for Agility Writer transforms our software from a simple content generator into a complete content pipeline.
Once configured, the manual work of transferring content between tools completely disappears. This lets your team focus purely on content strategy and quality control rather than tedious logistics.
We invite you to connect your first site today. Setting up the API takes just a few minutes, but the time savings will compound with every single article you publish.
Ready to Create Content That Ranks?
Start generating SEO-optimized articles with Agility Writer.
Try Us at $1